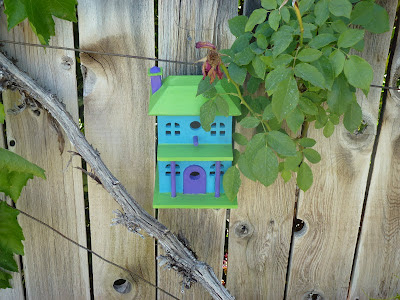
In this tutorial I will be showing you how to prepare and mount your own birdhouse to a wall, a post, a tree, etc. It isn't hard and you can do it all for
under 10 dollars.
Gather Supplies
Pre-Assembled, Un-Painted, Wooden Birdhouses from Craft Store
Michaels was having a sale on birdhouses over Memorial weekend. Every size and shape of un-painted birdhouse were only 4 dollars. My wife and I picked out 4. If you are new to this sort of thing, I suggest going with the simple birdhouses. The ones that have a bunch of windows and nooks and crannies are much more difficult to paint.
Some birdhouses have string already attached to the top which make them easy to hang. If you are wanting to mount them rather than hang them, there is no need to get the ones that have string already attached. I will show you how to mount them later on.
Toll-House Paint and Brushes
While at the craft store, pick out a few bright paint colors. Toll-House paint works really well because it dries fast and you can easily paint over any mistakes. You will also want to pick up a few different sized brushes.
Start Painting
Dive right in! You may want to image what the birdhouse will look like in your mind before you start, once you have a basic idea, go for it. Because these birdhouses will be hung or mounted, be sure to paint the bottom.
Mounting
Supplied Needed
- Power Drill
- Smallish Drill Bit
- Metal Wire
- Hammer
- Nails
Drill Holes
Using a power drill, drill 4 holes in the back of the birdhouse; 2 on top and 2 on bottom. You will then need to run the wire from the front of the birdhouse, through the holes, and out the back. You may want to position the 4 holes in a way that makes running the wire through them easy. One wire goes through the two top holes, and one wire goes through the two bottom holes. So you should end up with four wire ends coming out; one from each hole.
Twist Wire
Now you must create the mounts by twisting the wires together. Twist the top wires together, and the bottom wires together. As you twist, you may want to make a loop for the nail to go through which will make for a much more sturdy mounting.
Nail
Using a hammer, send a nail through the top wires that you have twisted together and into the fence, poll, tree, or what-have-you. Do the same to the bottom wires, pulling the bottom wires tight before you nail.
 |
| The thick wire you see in these pics are for the grapevines, not the birdhouses :) |
And there you have it! Let me know if you have any questions!

No comments:
Post a Comment